
How to record a Zoom meeting with a virtual background
In today’s digital age, virtual meetings have become an integral part of our professional and personal lives. Platforms like Zoom have revolutionized the way we communicate, making it easier than ever to connect with colleagues, clients, friends, and family regardless of geographical barriers. One of the standout features of Zoom is its ability to add virtual backgrounds, transforming your surroundings with just a few clicks. But did you know that you can also record these meetings with virtual backgrounds? In this guide, we’ll walk you through the process step-by-step, using a grabador de pantalla para PC to capture your Zoom meetings with virtual backgrounds seamlessly.
Understanding the Basics: Zoom Virtual Backgrounds
Before we delve into grabar pantalla de Zoom con un fondo virtual, let’s first understand how to set up and use virtual backgrounds in Zoom:
Selecting a Virtual Background: When you’re in a Zoom meeting, click on the “^” icon next to the “Start/Stop Video” button at the bottom left corner of your screen. From the menu that appears, choose “Choose Virtual Background.”
Choosing or Adding Backgrounds: You can choose from the preloaded backgrounds or add your own by clicking on the “+” icon. Ensure that your chosen background image is in a suitable format (e.g., JPG or PNG) and meets the recommended resolution.
Adjusting Settings: Once you’ve selected your background, Zoom allows you to adjust settings like “Mirror my video” and “I have a green screen” to optimize the virtual background experience.
Recording a Zoom Meeting with a Virtual Background
Now that you’ve mastered the art of virtual backgrounds in Zoom, let’s explore how you can record your meetings with these captivating backgrounds:
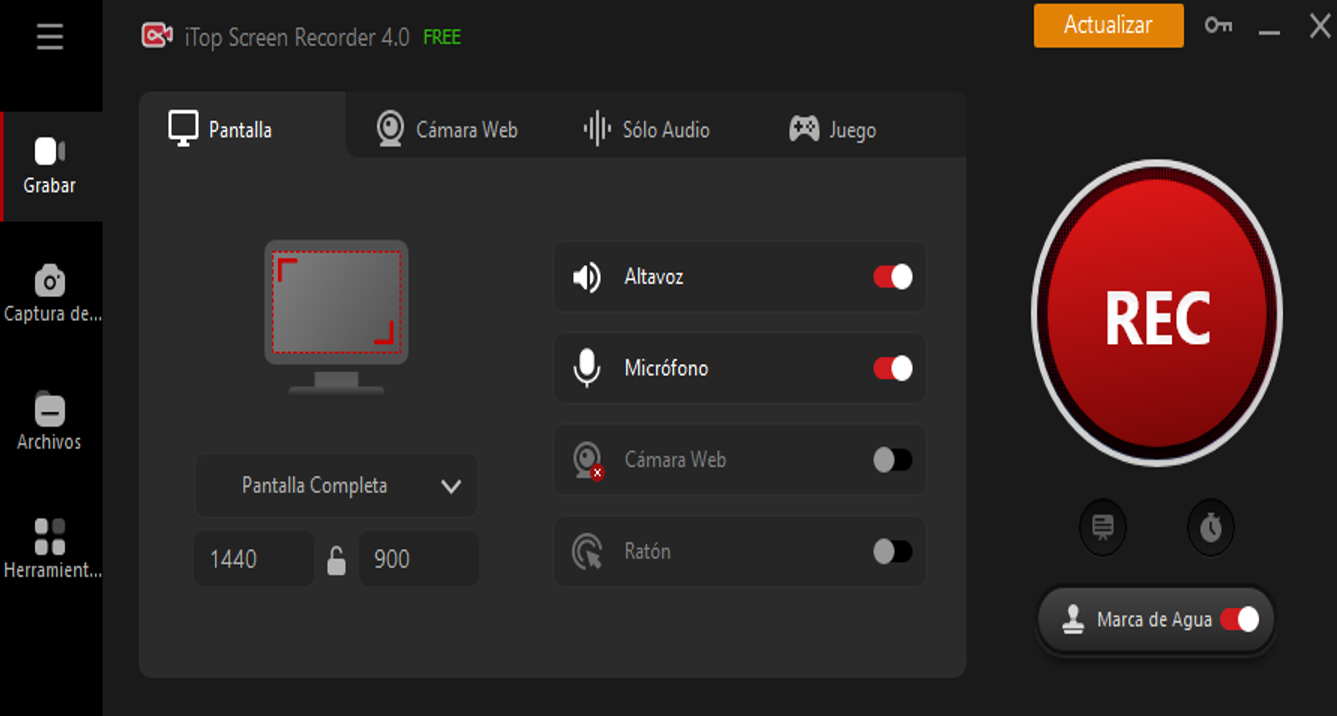
Step 1: Choose a Reliable Screen Recorder
There are several screen recording software options available for PC users, each offering unique features and functionalities. Some popular choices include iTop Screen Recorder, Camtasia, and Bandicam. Select a screen recorder that suits your requirements and preferences, ensuring it supports recording both audio and video.
Step 2: Configure Screen Recording Settings
Once you’ve installed your chosen screen recorder, take some time to configure the settings according to your preferences. Ensure that you select the appropriate audio input source to capture both your voice and the audio from the Zoom meeting. Additionally, adjust the recording area to capture the entire Zoom window along with the virtual background.
Step 3: Start the Zoom Meeting
Launch Zoom and join the meeting that you wish to record. Make sure that your virtual background is enabled and configured to your liking before proceeding with the recording.
Step 4: Begin Screen Recording
With the Zoom meeting in progress and your virtual background set, start the screen recording software on your PC. Most screen recorders offer a “Start Recording” button or hotkey (often F9 or F10) to initiate the recording process. Click this button or use the designated hotkey to begin capturing your screen along with the audio.
Step 5: Interact and Record
Engage in the Zoom meeting as usual, ensuring that you maintain an active presence and contribute to the discussion. The screen recorder will capture everything displayed on your screen, including the virtual background, participants’ video feeds, and any shared content.
Step 6: End the Recording
Once the Zoom meeting concludes, stop the screen recording by clicking the “Stop Recording” button in the screen recorder software or using the designated hotkey. Review the recorded footage to ensure everything has been captured as intended.
Tips for Optimal Results
To ensure the best possible outcome when recording Zoom meetings with virtual backgrounds, consider the following tips:
- Use a Stable Internet Connection: A stable internet connection is essential for smooth video conferencing and recording. Ensure that your internet connection is robust to minimize disruptions during the meeting.
- Optimize Your PC Settings: Close any unnecessary applications or browser tabs running in the background to free up system resources and optimize performance during the recording.
- Choose Suitable Backgrounds: Select virtual backgrounds that complement your surroundings and avoid distractions. Opt for high-quality images with minimal clutter to maintain a professional appearance.
- Test Before Recording: Before recording an important meeting, conduct a test run to familiarize yourself with the screen recording software and ensure everything is functioning correctly.
Conclusion
Recording Zoom meetings with virtual backgrounds is a valuable skill that allows you to capture and preserve important discussions, presentations, and collaborations. By following the steps outlined in this guide and utilizing a reliable screen recorder for PC, you can effortlessly record your Zoom meetings with virtual backgrounds and enhance your remote communication experience. Embrace the power of technology to stay connected, productive, and engaged in an increasingly digital world.